Quarantined. Shelter at home. Stay at home. Social distancing. By now, this is something we’ve all become very familiar with.
“Non-essentials are to close” is a phrase us photographers have heard a lot about, as well. Sadly, as important as photos are, we are non-essential to day-to-day life. But people are still having babies and wanting their newborn photographed. So what to do?
If you are one still wanting to record these precious memories and you have a DIY spirit, here are some tips and tricks to help you make the best of the situation since a professional cannot help you at this time! They may not look like professional photos in the end and that’s ok! At least you have something to remember this phase as they quickly grow up.
You don’t need fancy equipment. Just a window and a camera (if you know how, set your camera to a low aperture. The smaller the number the better)! If all you have is your phone, then use that!
1. Light
Light can be hard or soft. Warm or cool. You best bet is to find a window with indirect light coming through. If you have a window sheer, pull that across to diffuse it even more. Turn off the lights in the room so you are relying on the window light, only. If your camera has a flash, turn it off! Then when working with the light, have the light coming across their face or from the top of the head, down. In other words, point their head towards the light source. Otherwise you will end up with a spooky uplit face (like when you put a flashlight under your chin for scary stories).
2. Angles
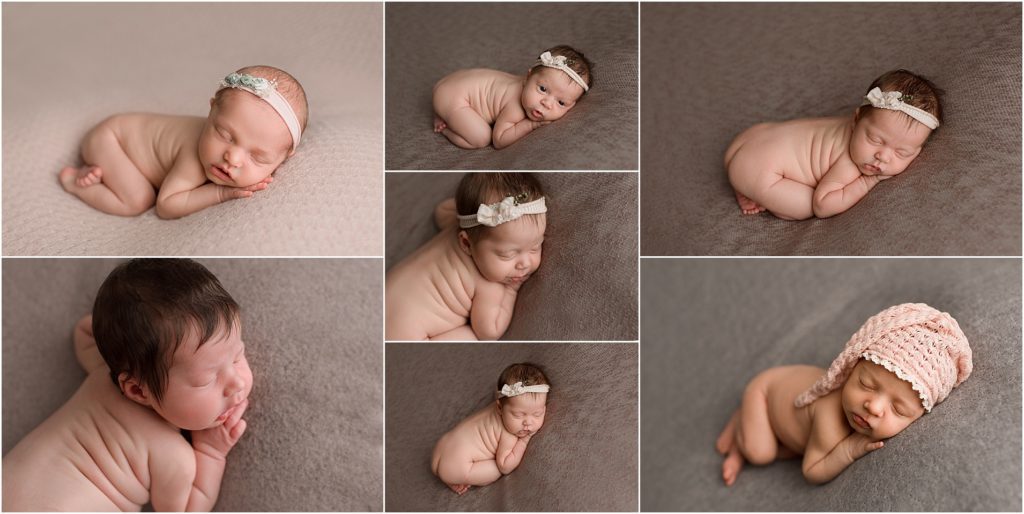
Angles are your best friend. If you can see up your baby’s nose, change your angle (think of it as when you accidentally turn on your selfie camera and you are horrified at how you look). Don’t shoot from the butt either – you don’t want the butt to be the focus! Whatever is closest to the camera will look the biggest and will be the focus. So think of pointing your camera at the head and angling down the body. Move yourself all around to get all the angles you can – from up above, from the head, tilt your camera for a slight change, etc. The first set of photos below is the same/similar pose but several different angles.
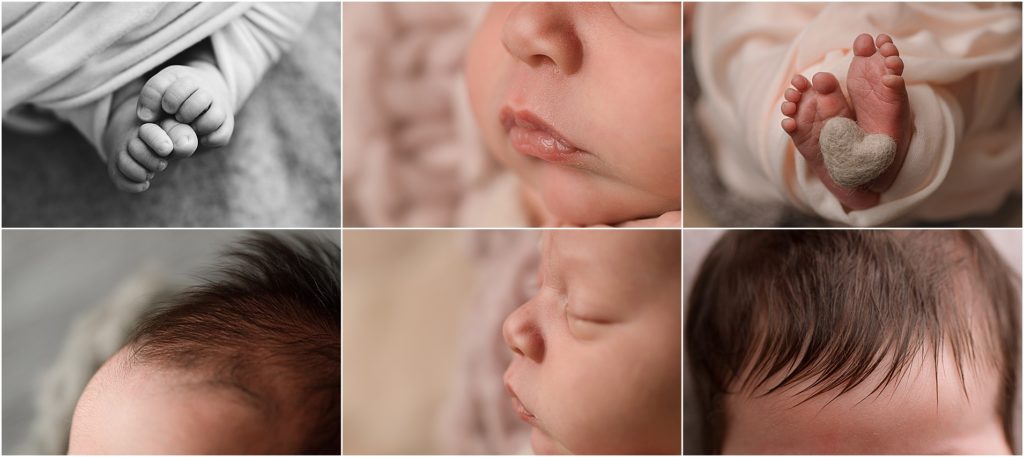
Bonus: If you can zoom in for some detail shots of toes, lips, eyelashes, hair (if they have any) are always fun to have, too. They change so fast! A macro lens is the easiest to do this, but zooming in can have a similar effect.
3. Props
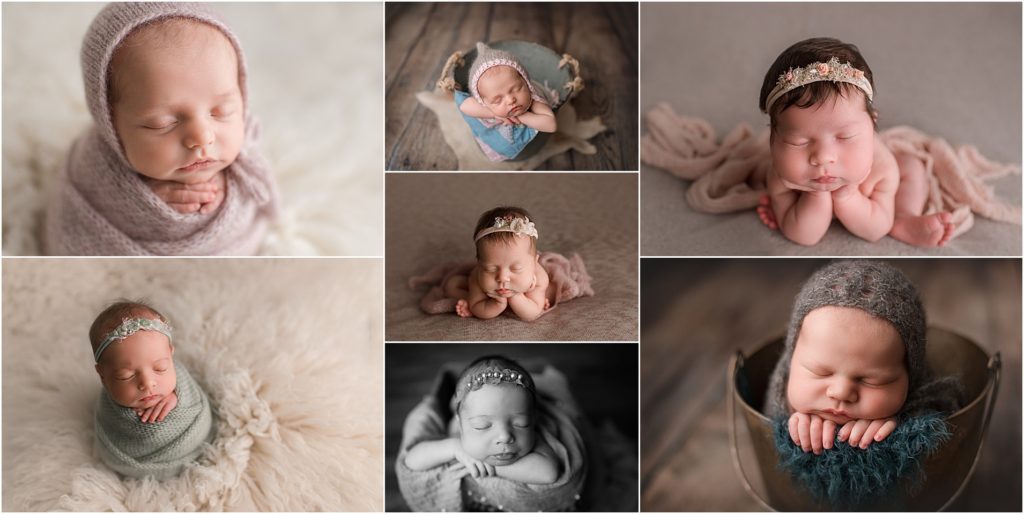
Usually less is more. A simple, thin wrap. A dainty headband (please keep the bow smaller than your baby’s head). A cute hat or bonnet. A solid colored blanket for a background. Keep in mind that the more “stuff” you use the more chances it has to look sloppy or cluttered. You don’t want your newborn looking like a Where’s Waldo page because they’re surrounded by so many things. Plus, props can really date things – if you’re going for a timeless look then less is more.
Wrapping can be your best friend for doing this successfully. Newborns don’t have limb control and they move them all around and startle themselves awake. Babies love to be swaddled (although they may not like the process to get there) and controlling those limbs let you focus on their face.
4. Be safe.
I’m sure you’ve seen these poses…
I cannot stress enough to NOT do them. They are very advanced and/or are composites, so please don’t risk it. For bucket photos, one flail and they could flop over!
Stick with your baby sweetly sleeping. Or your spouse holding them by a window. Or them laying in their crib. Or your other children laying with them on a bed, cuddling gently. Imagine the photo below, but on a bed. Don’t forget to put the neck strap of your camera around your neck when standing over your kids. Accidentally dropping your camera on your child’s face probably isn’t your goal, so be safe and use it.

Also, do yourself a favor and keep that diaper on…unless you like unpredictable pee and baby poop on your items. The diaper is on for nearly all of these photos. If you can’t see a naked butt, the diaper is on!
Also, sibling tip: Bribe them. Screen time. Candy. Cupcakes. Whatever it takes!
5. Editing
You can if you’d like. Photoshop isn’t a magic wand to fix everything, but it can enhance your photos. Adobe does have Lightroom for phones and tablets. Your phone may also have some built in editing features. Whatever you do, do not make the baby’s skin so smooth that they are difficult to see or look fuzzy, glowing, or plastic. And please don’t go crazy by fiddling with the filters too much. Usually some simple, small changes is all you will need. Or a simple black and white conversion is beautiful, as well! If there’s one you love feel free to send it to me and I can edit it for you, too. stacy@golden-photography.net
You may learn that its a lot harder than it looks, and that’s ok!!! I’ve been shooting newborns since 2009 and I was also taken by surprise by how tricky it is! The important thing by doing this is that you are safe, photographers are following the government’s demands AND you are preserving this brief moment with your baby. You’ll have a chance for professional photos when they are 6 months or 1 year old!
Stacy Golden owns Golden Photography in downtown Lake Zurich IL, a suburb of Chicago, where she has been photographing maternity, newborns, families, and commercial work since 2009. She’s currently sheltering at home and cannot wait to break out to begin photographing for you ASAP. Feel free to contact her if you liked this article or are thinking about photos later this year after work can resume!